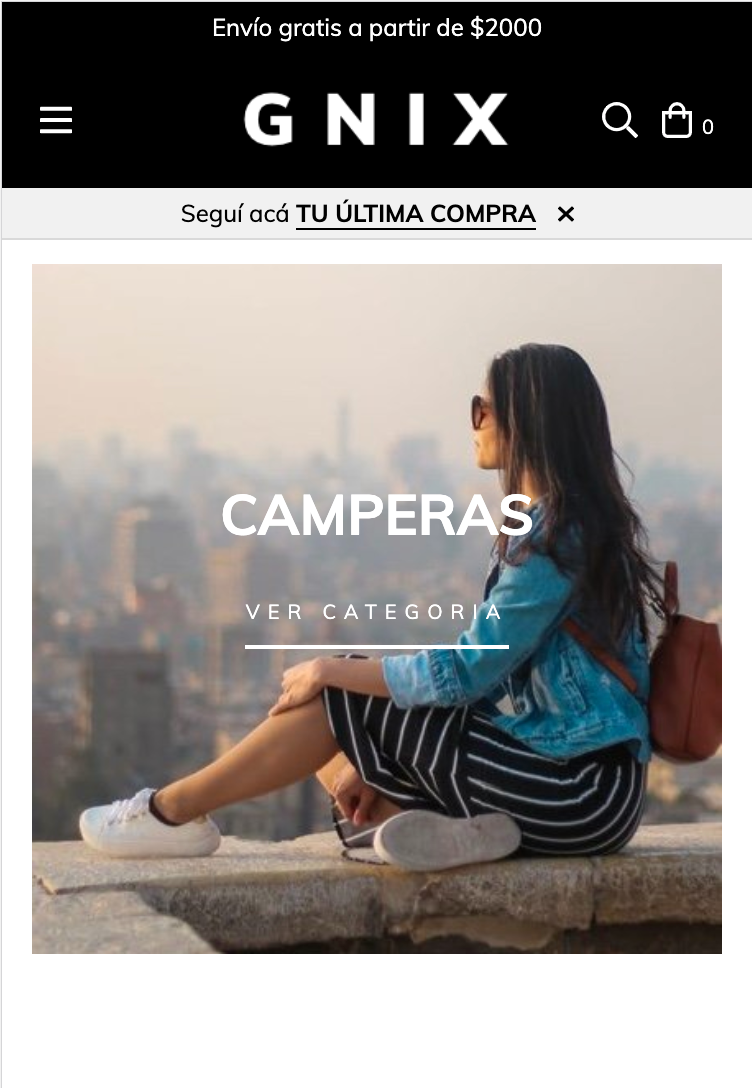
Con este tutorial aprenderás cómo mostrar una barra de seguimiento de la última orden, dando a los compradores de la tienda acceso al detalle y estado de su compra.
HTML
Lo primero que vamos a hacer es crear el tpl de la notificación, si es que ya no lo tenes. También se utiliza para notificar que agregaste un producto al carrito.
1. Verifica si ya tenés en la carpeta snipplets un archivo llamado notification.tpl. En el caso de que no exista, creálo y copia el siguiente código y si ya lo tenes, agregá esto:
{# Order notification #}


{% if order_notification and status_page_url %}
    <div data-url="{{ status_page_url }}" class="js-notification notification notification-secondary" style="display:none;">
        <div class="container">
            <div class="row">
                <div class="col">
                    <span>{{ "Seguí acá" | translate | a_tag(status_page_url) }}</span> <span class="btn btn-link">{{ "tu última compra" | translate }}</span>
                    <a class="js-notification-close ml-2" href="#">
                        {% include "snipplets/svg/times.tpl" with {svg_custom_class: "icon-inline svg-icon-primary"} %}
                    </a>
                </div>
            </div>
        </div>
    </div>
{% endif %}
2. Incluimos el snipplet de notificaciones en el archivo snipplets/header/header.tpl o donde tengas la navegación de tu tienda, antes de cerrar la etiqueta <head></head> de la siguiente manera:
{% include 'snipplets/notification.tpl' with {order_notification: true} %}Si ya estas llamando a este snipplet para la notificación del carrito, tenes que agregarle el parámetro “order_notification: true” quedando:
{% include 'snipplets/notification.tpl' with {order_notification: true, add_to_cart: true} %}3. Por último para la parte de HTML, necesitamos agregar una carpeta SVG dentro de la carpeta snipplets. Acá vamos sumar el SVG que usamos para el icono para cerrar la notificación.
times.tpl
<svg class="{{ svg_custom_class }}" xmlns="http://www.w3.org/2000/svg" viewBox="0 0 320 512"><path d="M207.6 256l107.72-107.72c6.23-6.23 6.23-16.34 0-22.58l-25.03-25.03c-6.23-6.23-16.34-6.23-22.58 0L160 208.4 52.28 100.68c-6.23-6.23-16.34-6.23-22.58 0L4.68 125.7c-6.23 6.23-6.23 16.34 0 22.58L112.4 256 4.68 363.72c-6.23 6.23-6.23 16.34 0 22.58l25.03 25.03c6.23 6.23 16.34 6.23 22.58 0L160 303.6l107.72 107.72c6.23 6.23 16.34 6.23 22.58 0l25.03-25.03c6.23-6.23 6.23-16.34 0-22.58L207.6 256z"/></svg>CSS
Requisito:
Tener agregados en tu diseño las clases helpers. Podés seguir este este pequeño tutorial para hacerlo (simplemente es copiar y pegar algunas clases, no toma más de 1 minuto).
1. Agregamos el siguiente SASS de colores en style-colors.scss.tpl (o la hoja de tu diseño que tenga los colores y tipografías de la tienda). Recordá que las variables de colores y tipografías pueden variar respecto a tu diseño:
{# /* // Mixins */ #}


@mixin prefix($property, $value, $prefixes: ()) {
    @each $prefix in $prefixes {
        #{'-' + $prefix + '-' + $property}: $value;
    }
       #{$property}: $value;
}


{# /* // Buttons */ #}


.btn{
  text-decoration: none;
  text-align: center;
  border: 0;
  cursor: pointer;
  -webkit-appearance: none;
  -moz-appearance: none;
  appearance: none;
  text-transform: uppercase;
  background: none;
  @include prefix(transition, all 0.4s ease, webkit ms moz o);
  &:hover,
  &:focus{
    outline: 0;
    opacity: 0.8;
  }
  &[disabled],
  &[disabled]:hover{
    opacity: 0.5;
    cursor: not-allowed;
    outline: 0;
  }
  &-default{
    padding: 10px 15px;
    background-color: rgba($main-foreground, .2);
    color: $main-foreground;
    fill: $main-foreground;
    font-weight: bold;
  }
  &-primary{
    padding: 15px;
    background-color: $primary-color;
    color: $main-background;
    fill: $main-background;
    letter-spacing: 4px;
    &:hover{
      color: $main-background;
      fill: $main-background;
    }
  }
  &-secondary{
    padding: 10px 15px;
    background-color: $main-background;
    color: $main-foreground;
    fill: $main-foreground;
    border: 1px solid $main-foreground;
  }
  &-block{
    float: left;
    width: 100%;
  }
  &-small{
    display: inline-block;
    padding: 10px;
    font-size: 10px;
    letter-spacing: 2px;
  }
}


.btn-link{
  color: $primary-color;
  fill: $primary-color;
  text-transform: uppercase;
  border-bottom: 1px solid;
  font-weight: bold;
  cursor: pointer;
  &:hover,
  &:focus{
    color: rgba($primary-color, .5);
    fill: rgba($primary-color, .5);
  }
}


{# /* // Alerts and notifications */ #}


.notification-primary{
  color: $primary-color;
  fill: $primary-color;
  border-color: rgba($primary-color, .2);
  background-color: rgba($primary-color, .1);
}


.notification-floating .notification-primary{
  background-color: $main-background;
  border-color: rgba($primary-color, .2);
}


.notification-secondary {
  padding: 5px 0;
  background: darken($main-background, 3%);
  color: rgba($main-foreground, .8);
  border-bottom: 1px solid rgba($main-foreground, .1);
}
2. Agregar los estilos dentro del archivo static/style-critical.tpl
Si en tu diseño usas una hoja de estilos para el CSS crítico, vamos a necesitar agregar el código debajo dentro de la misma, pero si no es el caso podés unificar el CSS de los pasos 1 y 2 en un solo archivo.
{# /* // Notifications */ #}

.notification{
  padding: 10px;
  opacity: 0.98;
  text-align: center;
}
.notification-close {
  padding: 0 5px;
}
JS
⚠️ A partir del día 30 de enero de 2023, la librería jQuery será removida del código de nuestras tiendas, por lo tanto la función "$" no podrá ser utilizada.
1. El JavaScript necesitamos agregarlo en el archivo store.js.tpl (o donde tengas tus funciones de JS). El código que necesitamos para la notificación es el siguiente:
{#/*============================================================================
      #Notifications
    ==============================================================================*/ #}

    var $notification_status_page = jQueryNuvem(".js-notification-status-page");

    {# /* // Follow order status notification */ #}


    if ($notification_status_page.length > 0){
        if (LS.shouldShowOrderStatusNotification($notification_status_page.data('url'))){
            $notification_status_page.show();
        };
        jQueryNuvem(".js-notification-status-page-close").on( "click", function(e) {
            e.preventDefault();
            LS.dontShowOrderStatusNotificationAgain($notification_status_page.data('url'));
        });
    }
Traducciones
Para terminar agregamos los textos para las traducciones en el archivo config/translations.txt
es "Seguí acá"
pt "Acompanhe aqui"
en "Track here"
es_mx "Sigue aquí"

es "tu última compra"
pt "seu último pedido"
en "your last order"
es_mx "tu última compra"
Observaciones
Al cerrar la barra, la misma ya no se mostrará nuevamente hasta que se inicie una nueva sesión. La cookie expira 30 días después de la compra.